Hard boiled eggs are a staple for various reasons: meal-prep, egg salad, potato salad, stuffed eggs, as a topper for a salad, inside of a delicious and ultra-fattening Scotch Egg, or on their own as a quick snack. According to The Incredible Egg, one egg is:
70 calories, 5 grams fat, 0 grams carbs, 6 grams protein, among other nutrients.
That’s pretty good.
Eggs cooked in the shell are good for up to one week, according to TheKitchn. I usually make mine on Sundays for the boys’ breakfasts during the week and for my post-workout snacks. My Instant Pot comes in as the nearly-foolproof way to make a bunch of them.
When I first got my Instant Pot, there were so many naysayers about how amazing it is. But hard cooked eggs is a reason why the Instant Pot is so amazing.
There are so many reasons why hard cooking eggs in the Instant Pot is awesome. The shells come off easily, you can cook one or one dozen, there’s very little babysitting involved, and there are so many uses for this powerhouse food.
The Shells Peel off Incredibly Easy
Nine times out of 10, the shells slip off, leaving you with a perfectly smooth white interior. This method (that I call “4-3-4”) does not overcook the yolk – something that my little guy hates and will refuse to eat it if the yolk is grey.
You Can Cook as Many Eggs as Will Fit
You can literally cook as many eggs as you want as long as they fit in the Instant Pot you are using. You can make one or one-dozen. Need six eggs for the week? Order up!
You Don’t Have to Worry Much
This recipe does need a little bit of babysitting, but not much. You’re really watching the clock. You don’t have to worry about water boiling over on the stove. No need to add baking soda or salt salt, or starting with cold or hot water. No guess work. No fuss. I find that this is really the best way to make hard cooked eggs!
Too Many Eggs? Not a problem
I love egg salad sandwiches. So delicious and ready in an Instant. See what I did there? LOL!
One time, I made too many eggs and they were going to go bad. I had some mayo, some yellow mustard, garlic powder, salt, and soon, I had a delicious egg salad sandwich to munch on while thinking about how I was going to type up this post!
Bowl large enough for all of your eggs after they’re cooked (or a clean sink)
*Tip: Don’t use the trivet. A sturdy steamer basket that doesn’t flop around when you move it will serve you best. Time is usually of the essence at the end of this recipe. The best thing about the steamer basket is that you can just pull it out of the pot and drop it straight into an ice bath.
Ingredient List:
As many eggs as you want
1 cup of water for the inner liner
Ice for the bowl for after the eggs are cooked
Water for the bowl for after the eggs are cooked.
Recipe Instructions:
Pour one cup of water into the inner liner of your instant pot.
Set your basket in the pot.
Gently place your eggs in the pot.
Place the lid on and lock it in with a quarter turn clockwise.
Set your sealing knob to sealing (turn it back).
Press the manual or pressure cook button (depending on your model) and use the +/- buttons to set it to 4 minutes.
After the cooking cycle is complete, set out your bowl and fill it halfway with ice. Pour water into it and keep it handy.
Once the screen says: L 00:03, carefully turn the knob to venting.
Once all the pressure has been released and the pin has dropped, carefully open the lid away from your face.
Pull the eggs out and place them into the ice bath.
Let cool for at least four minutes.
Peel and enjoy, or store in the refrigerator for up to a week.
Thank you for sharing some of your screen time with me! If you liked this recipe, please hit the like button so I know to make more content like this. Tell me what you want me to try making next in the comments below. Also, check out my Facebook and Instagram (tag me at @cookwithsamib) for more photos and my Pinterest for what inspires me. Finally, don’t forget to subscribe to my blog for updates when I hang new posts!
Let me know how you use up your hard boiled eggs in the comments below. Share with your friends, and don’t forget to subscribe. That way, you won’t miss a single food post.
Chicken is wonderful. Growing up, I only liked eating white meat chicken. I found thighs, legs, and backs to be entirely too much for me. Besides, my mother always made the juiciest chicken breast whenever she roasted her chicken. Someday, I’ll do a pollo al horno (oven-roasted chicken) recipe to post here. Hopefully it’ll be just as good.
When I bought my Instant Pot years ago, one of the things that intrigued me was the fact that it could cook a five- to six-pound whole chicken in about an hour. This is insane to me, because I normally oven-roast my chickens for 20-25 minutes per pound. The Instant Pot does it at about 5.5 minutes per pound. So, for a five pound chicken, the traditional oven method takes an hour and forty minutes to two hours and five minutes. However, the Instant Pot cooks the same sized bird in about 63 minutes from start to finish! That’s about 4 minutes each side of browning, 2 minutes to deglaze the bottom of the pot, 10 minutes to build pressure, 28 minutes (rounded up) for cooking, and about 15 minutes for a natural pressure release.
On top of this, the oven method does not produce much by the way of drippings, whereas the Instant Pot creates a delicious broth that you can freeze to use for later. My recipe below will create a delicious, juicy, tender, fall-off-the bone chicken with a flavorful broth. This chicken is great for meal prep, simple dinners with picky children, chicken salad, cheesy chicken alfredo (a hit with the kids!), chicken for salads, or anything else your heart desires.
I bought my Instant Pot in 2016 for about $69 from Amazon. At the time, having newly bought a house, extra expenditures were not on the list. We were going to have a simple Thanksgiving and Christmas and start to save money again. That meant not just spending money on the newest, flashy things. I’ll admit that I have a bit of a thing for kitchen gadgets. Toaster ovens, waffle makers, slow cookers, blenders, choppers, you name it. If it was a new gimmicky thing, you can bet your bottom dollar I at least considered buying it.
One of my best friends wanted to get me an Instant Pot as a house-warming gift. She sang its praises from top to bottom and said I had to have one. Well, when I saw it on sale on Amazon at such a deeply discounted price (it used to sell for over $100), I couldn’t NOT get it. My friend was a little disappointed and got us a deep fryer instead. That poor deep fryer has now been collecting dust on the patio since we can’t really have high fat food anymore.
In the meantime, the Instant Pot has almost never failed me. Within a couple of weeks of getting the Instant Pot, I finally took it out of the box and wondered what I was going to make first. I decided that a whole chicken would be the first experiment to see if this appliance was all that it was hyped up to be.
I seasoned it liberally with salt and a poultry seasoning I used for my roasted chicken, sauteed it on all sides, and set the cook time based on the 5.5 minutes per pound calculation. Folks, let me tell you that my husband keeps telling people how much luckier he is than I am because he married a woman who can cook.
I’ll say that Pinterest helped me along.
Equipment List:
6-quart Instant Pot
Trivet (I used the one that came with the pot)
Cutting board
Chef’s knife
Measuring spoons and cup
Oven-safe casserole dish to place the chicken in after cooking
Gloves (I use them to handle raw meat and minimize the chance of cross-contamination)
Wooden spoon to scrape up browned bits
Plate to place browned chicken prior to pressure cooking
Small bowl for the squeezed lemon juice
Ingredient List:
Broiler or fryer chicken.* (*See note below)
Desired amount of preferred seasoning. I used my own homemade Adobo seasoning.
1 tablespoon Kosher salt*
Lemon
2-4 tablespoons of preferred fat (I use bacon grease), divided
1 cup of water
*Note #1: Make sure the chicken you get isn’t too big for your pot. I can easily get a six-pound chicken into this pot, but that’s about the largest I’d go in a 6-quart. If you have an 8-quart, you could probably go for a seven- or possibly eight-pound bird. If you have a 3-quart, I recommend you stick to Cornish hens, since you can handle them pretty easily in the 3-quart. If you go for the 3-quart, reduce the water to about 1/2 a cup if you don’t want a ton of broth.
*Note #2: You can certainly omit the salt if you want to watch sodium intake. I only used salt for the cavity of the bird since my Adobo seasoning already has salt in it.
The cast of characters. Why did the chicken cross the playground? To get to the other slide! Har, har!
Recipe Instructions:
Don’t skip this step!: Take note of how much your chicken weighs, rounded to the nearest half pound! You will need this number when you calculate how long to cook the chicken for under pressure.
(Optional step) Wash your chicken. I know, there is a lot of information regarding whether you should wash your chicken. Does it need to be washed in the first place? Won’t it make the germs fly all over the kitchen? Does it really need the gamey taste washed out? I grew up in a Dominican home where you wash the chicken to make sure you get at all of the leftover pin feathers from the processing, peel off any outer skin, and wash off the accumulated blood. I usually just use plain water. My mother would wash the chicken with white vinegar.
Whether you wash your chicken or not, pat the bird dry inside and out with paper towels. This will help to ensure the seasoning sticks to the bird and you get as even of a sear as possible.
(Optional step) Season the cavity of the bird with salt.
Season the outside of the bird liberally.
Tuck the wingtips back behind the bird. Even though you don’t run the risk of burning the wing tips, tucking them back provides for better presentation and also gives you the option of broiling the bird for a crispy skin later!
I seasoned the outside liberally with my homemade Adobo seasoning. I heavily salted the inside cavity, too.
Set the Instant Pot to saute mode and higher for a hotter pot.
Once the display reads “HOT,” drop in two tablespoons of your grease or oil. Swirl it around the inner pot to coat the bottom.
Sear the chicken on both sides, starting breast-side down. Sear for about three to four minutes a side.
Meanwhile, cut your lemon in half and squeeze the juice into a small bowl. Do not discard the lemon.
During the browning process.
Place your trivet, with the handles out, on a clean plate.
Remove your chicken and set on the trivet atop the plate to rest a moment. Stuff with the squeezed lemon halves.
Deglaze the bottom of the pot with a little bit of the water from the measuring cup and a squeeze from half the lemon. Use a wooden spoon to scrape up those flavorful bits from the bottom of the pot. (My mouth is watering right now.)
Once the pot is deglazed, push the “Keep Warm/Cancel” button to stop the saute mode.
Pour the remaining water into the pot.
Carefully lower the trivet with the browned chicken into the inner pot.
Pour the lemon juice all over the chicken.
Set on top of a rack, ready to pressure cook!
Set and lock the lid onto the pot. Turn the sealing valve to sealing.
Pull out the calculator or ask Google or Siri to calculate the weight of your chicken by 5.5. Round UP to the nearest minute. (Example, a 5.5 pound chicken times 5.5 minutes is 30.25 minutes. I set this for 31 minutes of cook time.)
Press the poultry button and adjust the time to the calculated number (or you can use the manual button. It’s all the same). The pot should be on high pressure.
Walk away.
After the cook cycle is over, wait at least 10 minutes of natural pressure release prior to quick releasing any remaining pressure.
The resulting broth was full of flavor.
Remove the chicken and place into an oven safe dish. At this point, you can broil the chicken for a few minutes to get some delicious crispy skin.
Resting for a mere second before I tore into it.
When I pulled this chicken out, I lost the thighs, legs, and wings. It was super juicy and flavorful. I had it in an oven-safe casserole dish and I probably could have popped it in the oven for some browning, but I could hardly take this picture without gnawing at some breast meat!
Like I mentioned earlier, this chicken is so versatile for anything you want. Think BBQ chicken sliders, salad-topping, tacos, enchiladas… the possibilities are endless.
What do you like to use your chicken for? Hit me up in the comments!
Thank you for sharing some of your screen time with me! If you liked this recipe, please hit the like button so I know to make more content like this. Tell me what you want me to try making next in the comments below. Also, check out my Facebook and Instagram (tag me at @cookwithsamib) for more photos and my Pinterest for what inspires me. Finally, don’t forget to subscribe to my blog for updates when I hang new posts!
Pork is a favorite in my family. Whether it’s bacon, chops, ham, sausage or chicharones, pork is delicious. You can have it on sandwiches or on its own, sweet or savory, hot or cold, or however you feel like. No matter how I eat it, I love it tender, juicy, and flavorful.
Pork is a popular meat in Latin American dishes. Every Latin American family has their tried-and-true recipe for pernil, a delicious pork dish. This is a slow cooker version where the pork cooks at a low temp for the long daytime hours. When you come home, the smell of the pork will invite you in. I promise that your mouth will water and you might just eat it straight from the slow cooker.
I judge Mexican restaurants by how well they cook their pork. Is it tasty or bland? Is it tender, juicy, and moist or tough and dry? My husband laughs at me because I never fail to eat carnitas as a way of sussing out how good the restaurant is. If they don’t make a good pork dish, I won’t eat there again.
I developed this recipe because it was time for me to have my own pork recipe to pass along to my kids. This recipe is of the dump-and-go variety, which – if you don’t want to work too hard to have a good dinner on the table at the end of the day – is the way to go. Although, I strongly recommend that you do marinate the meat overnight. It’s worth the ten extra minutes to do that.
This recipe makes good work out of a pork shoulder. The shoulder is a tough cut of meat with a good amount of fat marbled throughout. Between the acidic nature of the juice and the low and slow method of cooking, the meat finally gives way and becomes tender and flavorful.
Equipment List:
7-quart slow cooker
Slow cooker liner
Juicer (optional, but helpful)
Chef’s knife
Cutting board
Measuring cup and spoons
Tongs to handle the meat
2 1-gallon freezer safe Ziploc bags
Ingredient List:
3 pound pork shoulder
1 medium sized white onion
Oranges (enough for about 1 cup of juice) (See Notes below)
Limes (enough for about 1/2 cup of juice)
1 tablespoon oregano
Salt and pepper to taste
2 tablespoons of garlic powder
1 head of garlic, cloves removed, peeled, and smashed with a knife
2 tablespoons of olive oil
2 bay leaves
Most of the ingredients for the recipe.
Note: if you wanted to cheat, you could use bottled orange juice, but I found that the extra sugar throws the flavor off for me. It’s worth the work to squeeze the juice yourself. You could also use bottled lime juice, but the flavor profile is off in my opinion.
Recipe Instructions:
Night before: Mix the 1 cup of orange juice, 1/2 cup of lime juice, olive oil, oregano, and garlic in a two cup measuring cup.
Salt and pepper the pork shoulder. If the shoulder is folded over, make sure to salt and pepper inside the fold as well.
Place the pork shoulder in a 1 gallon Ziploc bag.
Pour the juice mixture into the bag with the pork.
Remove as much air as possible and massage the bag to distribute the juices all over the meat.
I recommend that you add the marinade back into another Ziploc bag, just in case the first bag doesn’t hold.
Place the bag into the fridge for at least one hour. Preferably, you can do this for six to eight hours. If you can, flip the bag at least once.
Slice your onions. (Sometimes I add those to the marinade and sometimes I don’t. I don’t think it makes a ton of difference either way.)
The next day, set up your slow cooker. I usually line my slow cooker with a plastic liner made for this, which makes clean up super easy.
Add the sliced onions to the bottom of the slow cooker. If they are in the marinade with the meat, don’t worry about this step.
Add the shoulder and turn it so that the fat cap is on top. You want the fat to render through the meat if possible. If you have garlic or onions stuck to the top, try to move them to the sides of the shoulder.
Add two bay leaves.
Cover and cook on low for 6-8 hours.
Serve over Instant Pot JasmineRice. Make sure to pour the juices over the rice. You’re welcome.
I meant to try this as part of a Cuban Sandwich, but ate it all before I had the chance! This pork was fork-tender and so juicy. The flavors of the citrus and garlic make me hum while I eat it. And, my kids really enjoyed this as well. My littlest one likes this pork with white rice and sweet corn. How do you like your Cuban Mojo Pork?
Thank you for sharing some of your screen time with me! If you liked this recipe, please hit the like button so I know to make more content like this. Tell me what you want me to try making next in the comments below. Also, check out my Facebook and Instagram (tag me at @cookwithsamib) for more photos and my Pinterest for what inspires me. Finally, don’t forget to subscribe to my blog for updates when I hang new posts!
I love chicken adobo. I mean, LOVE. That delicious combo of vinegar and soy sauce with all the garlic you could stand, drizzled over some white rice and some tender, fall off the bone chicken makes my mouth water and the scale climb in number. However, my husband loves it more than I do. He will almost do a happy dance when he finds out that he’s going to have chicken adobo, he loves the dish so much. It’s almost comical how happy he gets, but I’ll take it as a compliment to my cooking.
Chicken adobo is a Filipino dish that is very simple to make, yet extremely satisfying. Growing up, adobo meant something else other than the dish I enjoy fairly frequently today. Check out this Chowhound article on the difference between Latin and Filipino adobo.
The word adobo may come from the Spanish word adovar which means to marinate. So, basically, this recipe is all about the marinade. Typically, the chicken is stepped in this delicious, vinegary, and tangy marinade and then braised in the same marinade. The yield is a tender, delicious meat, falling off the bone. Typically, this dish is done at a low temp and cooked over hours.
It’s easy to make this Filipino-inspired chicken adobo in the slow cooker, but it’s quicker and just as fantastic in the Instant Pot. In fact, as much as I love this dish, I don’t love how the house smells when I make it in the slow cooker. It’s still fragrant in the Instant Pot, but not quite as in-your-face. And besides, you can cook this and have dinner served within an hour or less. Have nothing planned for dinner tonight? Chicken adobo to the rescue. You have an excess amount of chicken? Put it together in a Ziploc bag and freeze it for dinner in a pinch. Read on for the recipe!
Equipment List:
6-quart instant pot
Tongs to flip the chicken
Measuring cup and measuring spoons
Serving ladle (I used the one that came with my pot)
Plate to hold the reserved chicken (optional)
Wooden spoon to saute the chicken (optional)
Ingredient List:
2 pounds chicken thighs – bone-in and skin-on
1 cup white vinegar
1 cup low sodium soy sauce (or aminos if going gluten free)
6-8 garlic cloves
1 teaspoon to 2 tablespoons peppercorns
2 bay leaves
1 tablespoon of canola or vegetable oil for browning (optional)
The Cast of Characters for this recipe include: garlic, bay leaves, chicken thighs, soy sauce, and white vinegar, and peppercorns (not pictured). Six simple ingredients for a delicious dinner!
Recipe Instructions:
Optional step: wash and pat dry the chicken pieces.
Optional step: set the Instant Pot to “Saute” and adjust to medium heat. When the display states “HOT,” pour in and swirl around the oil. When the display reads “HOT” again, saute the chicken, skin side down, in batches. Brown the chicken for about two minutes and flip. Saute for two minutes. Set aside the chicken on a plate.
After browning. I personally found that the browning does not add too much additional depth of flavor to the finished dish, but I’ll let you be the judge of that.
Pour one cup of white vinegar together with one cup of low sodium soy sauce in the inner liner of the Instant Pot.
Peel and smash the garlic cloves, as many as you would like to have. Add to the vinegar/soy sauce mix.
Add peppercorns. They don’t make the dish spicy, but the peppercorns add a nice kick in each bite. You can omit them altogether, if you prefer.
Add the chicken.
Stir everything together. If you’re able to submerge the chicken, this is a good time to do that.
Add the bay leaves on top.
Ready for some pressure.
Cook under high pressure for about 10 minutes. If cooking from frozen, cook for 13 minutes.
Allow the pot to rest for about 10 minutes after the cooking cycle is complete.
Release any of the remaining pressure.
Option step: Press the “Keep Warm/Cancel” button. Remove the chicken from the pot and set aside on a clean plate. Tent with aluminum foil to retain the heat. Press the saute button on the pot and boil the liquid for a couple of minutes to thicken slightly.
Plated with Instant Pot Jasmine Rice. It was so delicious the next day, too!
What do you enjoy the most about this recipe? I think it’s the tanginess of the vinegar mixed in with the saltiness of the soy sauce. I also really like how tender this chicken becomes. It practically falls off the bone. Not to mention, the garlic takes on a smooth and slightly sweet taste, which is nice smeared over the chicken or on the rice. Delicious!
Thank you for sharing some of your screen time with me! If you liked this recipe, please hit the like button so I know to make more content like this. Tell me what you want me to try making next in the comments below. Also, check out my Facebook and Instagram (tag me at @cookwithsamib) for more photos and my Pinterest for what inspires me. Finally, don’t forget to subscribe to my blog for updates when I hang new posts!
Hamburgers are one of my favorite things to eat. When done right, they are juicy, flavorful, and all around awesome. I love a well-seasoned, perfectly cooked, juicy burger. My favorite burger joint is a place called Clarke’s CharBroiler, which has a ton of choices to make your perfect burger. I don’t go there often because it’s spendy, but it’s delicious. It’s also a fairly quick drive to and from the office.
My recipe for burgers from frozen works pretty well and can be increased, if needed.
I enjoy burgers so much, that I’m pretty sure both kids came out the womb craving ground beef patties. I largely ate burgers, pizza, ice cream, and hot dogs while pregnant. I tried to eat right, but the cravings were real. So I decided to enjoy myself and eat burgers. When else could I eat what I wanted (within reason)? I was totally eating for two. Yes, excuses, I know.
As my kids grew up to be somewhat picky eaters, we could agree that one thing they would probably always enjoy is a burger. But think about the expense of going to the golden arches to get an OK burger. The time, money, and gas it takes to pick up a Happy Meal for the littlest one and a “Quarter Pound” for the big one. Making sure that the burger is plain, which isn’t just without cheese. Not to say that McDonald’s doesn’t have a place in their lives – after all, it’s a thing I do with them when we go to see the doctor – but when I learned how to make an Instant Pot burger from frozen, the game changed dramatically.
First of all, I will mention this. I love my Instant Pot. I will do my best to figure out how to cook everything in it. I know it’s ultimately impossible, but you can’t blame a girl for trying, and I’m sure gonna try. This appliance has changed my cooking life and added confidence in the kitchen, something I never had before.
That being said, I was skeptical about pressure cooked burgers. Why not throw it on the grill or make it on stove? Well, for starters, I don’t mess much with the grill; sometimes I just don’t want to stand there flipping burgers. Secondly, cleaning up the splatter after cooking on the stove is just a pain. I don’t like my stove much because it’s electric and I prefer a gas range. I also don’t like how long it takes to cook frozen burgers on the stove. After all, I don’t have a whole lot of room to work with on the stove, so I inevitably do one burger at a time, which.takes.forever. Not conducive to a quick meal.
Then, I read a post on the Instant Pot Community Facebook page about cooking fresh burgers for 10-15 minutes in the Instant Pot. I was intrigued. So I decided to give it a try with frozen and see what I came up with.
I haven’t had a bad Instant Pot burger yet. My kids devour theirs nearly every time. My husband is a believer and suggests it as a quick meal.
In fact, last night, we were at a loss last night for quick dinner options. We looked at each other after a minute and said “burgers.”
We were eating within 35 minutes.
I think it’s safe to say that this recipe is a keeper. Read on for the recipe and let me know what you think!
Equipment List:
Instant Pot – I used my 6-quart. The size pot depends on how many burgers you want to make.
Trivet with legs – the one that came with my pot is perfect
Aluminum foil
Ingredient List:
Frozen burger patties – I used 1/4 pound burgers from Costco
Kosher salt
Ground black pepper
Garlic powder
Or, seasonings of your choice
Condiments, lettuce, tomato, buns (or lettuce wraps if you’re going no carb)
1 cup water for the inner pot
Cast of characters for tonight’s quick dinner. I think it took me longer to set up the photo than actually prep and make the meal!
Recipe Instructions:
Tear a piece of aluminum foil just over 12″ long. Place a frozen patty directly in the middle.
Season liberally and to your heart’s content.
Salt, pepper, and garlic all over my burger. Yummy!
Wrap each burger by loosely folding the foil over.
Add one cup of water to the inner lining of the Instant Pot.
Place trivet inside the pot.
Stack the foil-wrapped burgers on top of each other in the pot. This allows the burgers to retain as close to a circular shape as possible during the cooking process. *Note that the ones in the middle will be fully cooked, but slightly pink in the middle.
This is how frozen burgers wrapped in foil look stacked in the Instant Pot.
Lock the lid in place and set the steam release valve to sealing.
Press the manual/pressure cook/meat button and using the +/- buttons, adjust the time to 18 minutes. (If you stack and don’t want any pink, go with 20 minutes).
About five minutes before the cooking cycle is over, prepare your toppings and condiments.
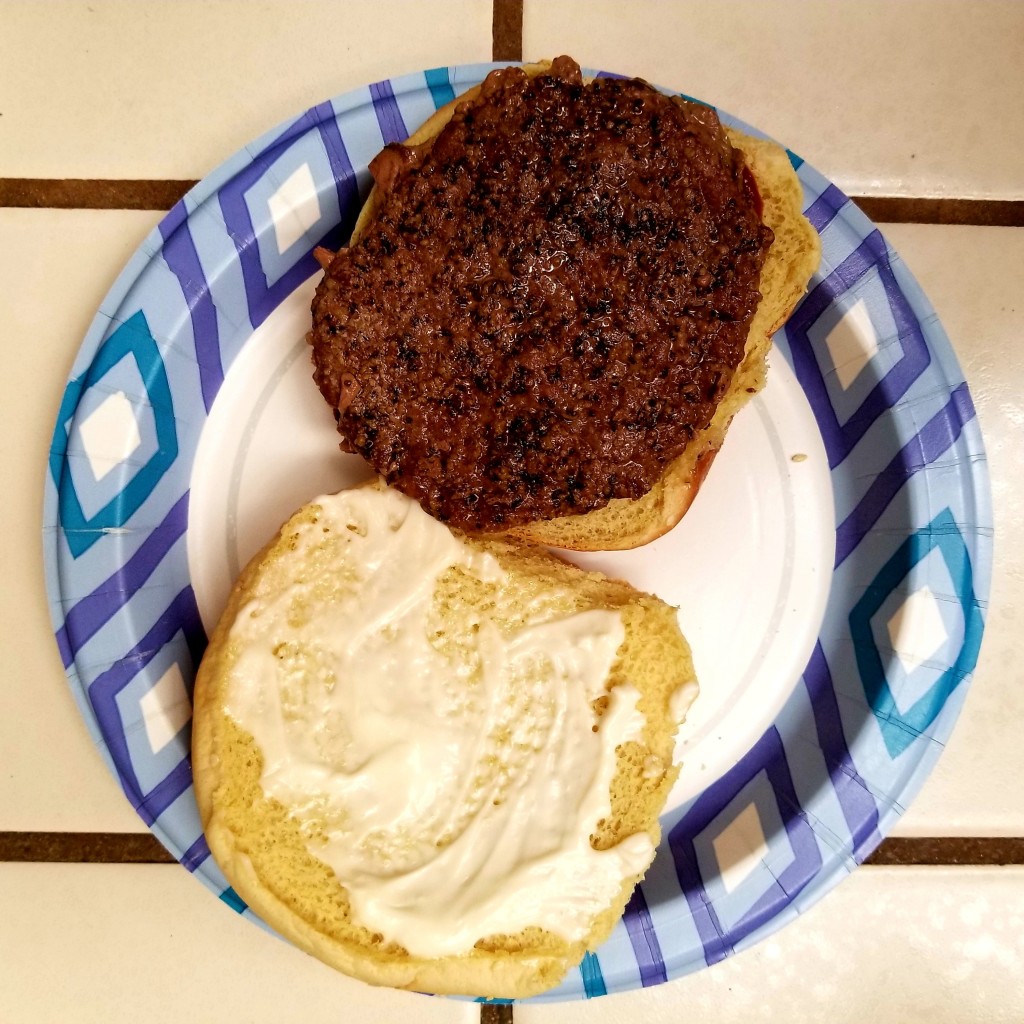
One of the burgers after the cooking cycle was over. Nice and juicy!
I decided to slather some mayonnaise on one of the burgers I made.
Assemble your burgers.
Enjoy!
An assembled dinner in less than 30 minutes.
How do you like your burgers? Let me know what sides you like with your burgers in the comments below!
Thank you for sharing some of your screen time with me! If you liked this recipe, please hit the like button so I know to make more content like this. Tell me what you want me to try making next in the comments below. Also, check out my Facebook and Instagram (tag me at @cookwithsamib) for more photos and my Pinterest for what inspires me. Finally, don’t forget to subscribe to my blog for updates when I hang new posts!


You must be logged in to post a comment.